Sunday, March 07, 2010

More top end work

I finally had a chance to sit and get the pistons off. I haven't gone over the rings yet, but I'm assuming that I'll probably need new ones.

I also got started on cleaning the cylinder block. It is quite a chore. Tried a drill-mounted paint stripper and that only got to the outsides. Tried a buffing wheel and there wasn't enough abrasives. Went back to my trusty TAL stripper - that stuff is amazing! Still, there's much more work to be done.

I gave a closer look to the cylinders since I hadn't had a chance prior. Cylinder no. 2 looks like it's got some pretty serious surface rust at the bottom end. Guess I'll have to bring them in and have some work done.

There's a pretty good shot of no. 2


No. 2 closeup

And the block before I started cleaning it:

Sunday, February 28, 2010

Top end is off (mostly)

I finally had some time to get at the top end this weekend. I'm partly documenting this for anyone else who may be doing the same thing, but mostly so I'll have a record for when I put it back together. I followed the instructions contained in the shop manual.

First thing is loosen the 6 bolts holding down the breather cover (mine was already off for cleaning).

Next, remove tappet hole caps, 12 screws, and 6 bolts holding down the cylinder head cover.

View of the cylinder head block with the cylinder head cover off:


That cylinder head cover contains the rockers. There is an intake and exhaust rocker. These are the pieces that the camshaft moves and the opposite side is the tappets that govern how much movement play there is for these rockers. I will be doing a thorough examination of the rocker arms, but initially I'm seeing wear that I would expect.

Hopefully my friends over on the SOHC4 forums will let me know if they see anything unusual.

Rocker arms for cylinder 1:
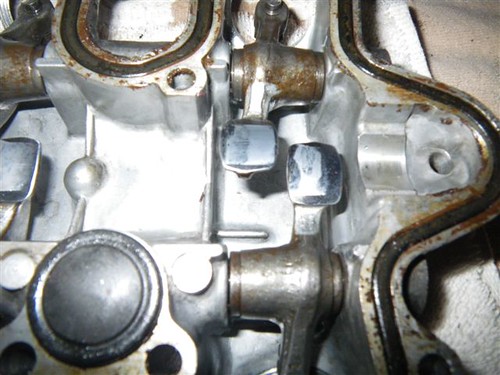

Rocker arms for cylinder 2:


Rocker arms for cylinder 3:
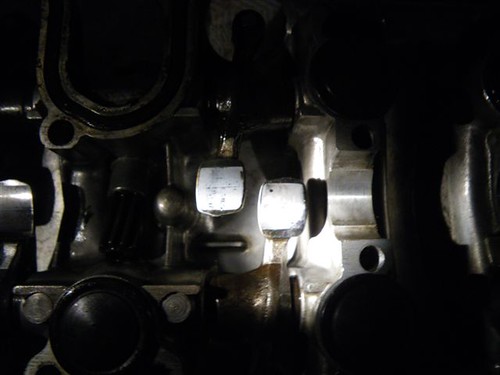

Rocker arms for cylinder 4:
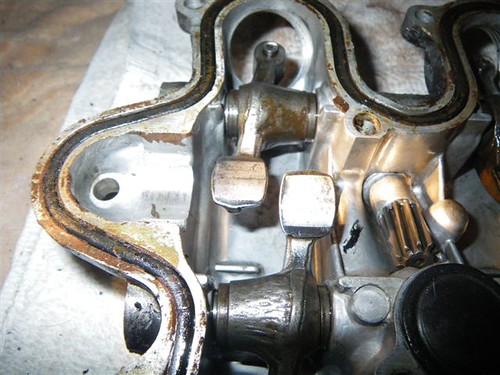


Next, there's a good bit of wrangling to get at the cylinder block. First, loosen the camchain tensioner lock nut and turn the camchain tensioner screw clockwise. There's a bit of resistance there, so push clockwise and you'll feel a bit of give. It helps if you have the cylinder head cover off so you can feel the cam chain getting loose as you turn with your opposite hand. On my engine, there was about 45 degrees of turn before it was as loose as can go.

The previous owner (PO) must have done some significant hacking on the camchain tensioner screw - it's not in great shape.

camchain tensioner screw:


After you've taken tension off the cam chain, tighten down the locknut to keep the tension off, then remove the two cam sprocket mounting bolts.

cam sprocket mounting bolts (side of cylinders 1 & 2):
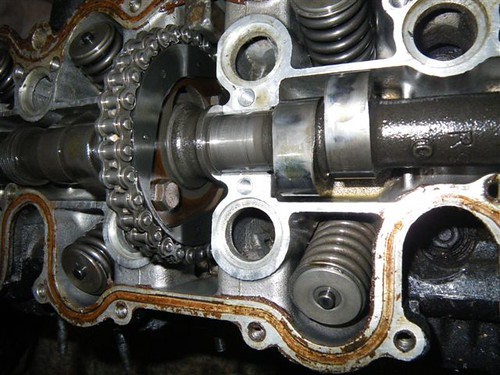

cam sprocket mounting bolts (side of cyliinders 3 & 4):
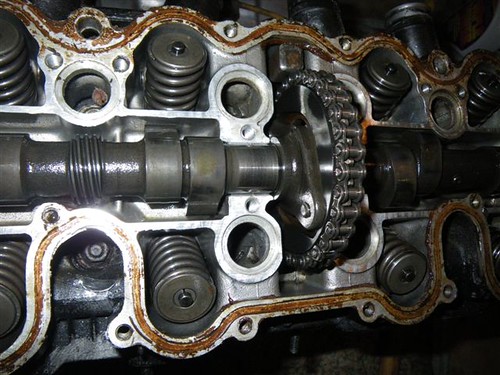


Next is where it gets interesting. After you remove those bolts (bag and label them for reassembly), you basically just separate the sprocket from the camshaft. It just sits on there a little off kilter. Then you pull the chain from the sprocket. Then you pull the sprocket of the camshaft. Finally, keeping a grip on the cam chain, you pull the camshaft out from the chain. Be careful not to drop the chain since it's a bit of a pain to get it back out.

Bolts out and sprocket separated:
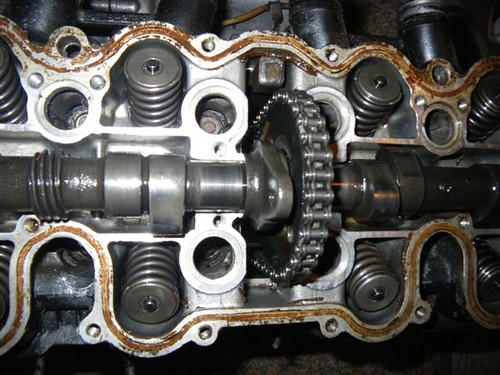

Cam chain off the sprocket:
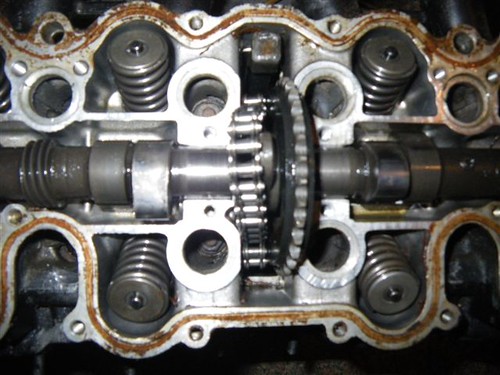

Now that the camshaft and sprocket are removed, you can use a screwdriver to loop through the cam chain to keep it from falling into the engine while you perform the next steps.

First, loosen the cam tensioner mounting bolt. I took it out entirely. Again bag and label. Next, unscrew the 12 cylinder head mounting nuts and the two flange bolts. There is a specific order to this since the nuts are torqued. It basically goes in x's starting at the inside - top left (center), bottom right (center), Bottom left (center), top right (center), then the next group. Loosen the two flange bolts last. Make sure that you keep track of which of those flange bolts goes where - I market my bag with instructions.

Now that you have everything all loosened, you'll need to carefully pry up the cylinder head block and remove it in order to remove the cam chain guide and cam chain tensioner.

Cylinder head block off:
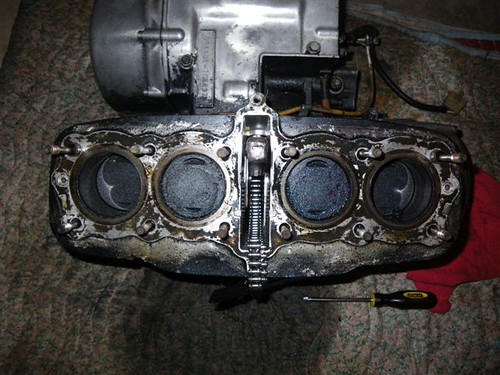

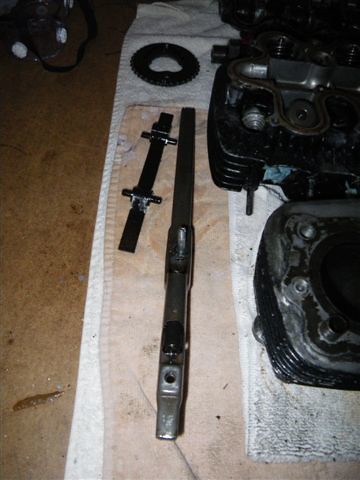
Now that you have the cylinder head block off, it's pretty easy to pull the cam chain guide. Just pull up and turn 90 degrees.

In order to get the cam chain tensioner out, you need to carefully pry up the cylinder block and then squeeze the spring a bit. It should wiggle out without much fuss now.

Finally, pull the cylinder block off. It should be loose enough now that you're broken the seal. Just carefully pull it off level - again, don't lose that cam chain.

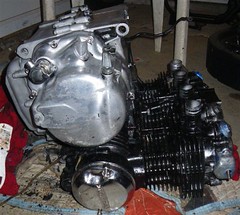
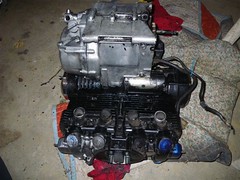
View of the bottom end with the cylinder block off (pistons still atached):
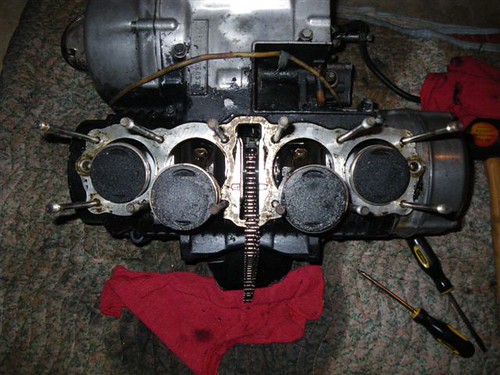

I'll pull the pistons off tomorrow. There are essentially some circular piston clips in the bearings on the side that require a pretty small set of needle-nose pliers. Mine weren't small enough so I'll need to pick some up tomorrow.

Here are some assorted pictures of parts.

Disassembled top end except for pistons:


Head gasket:


Cam tensioner, Cam chain guide, cam sprocket:
Sunday, February 14, 2010

A bit of good news?

In the meantime, while I wait for the experts to weigh in, I figured I'd do some cleanup of the frame so we could get a closer look at those welds.

I think I got a bit of good news.

2 things - I hit one of the forks with my trusty TAL stripper and it appears that all the crud was paint. There's minimal surface rust and a few scratches, but I should be able to buff those out and get these forks looking good.


For the second bit of good news, it appears that the PO left the rear shock mounts on the frame. I never looked closely before, but I assumed that he must have ground them off - I think these are them, aren't they?


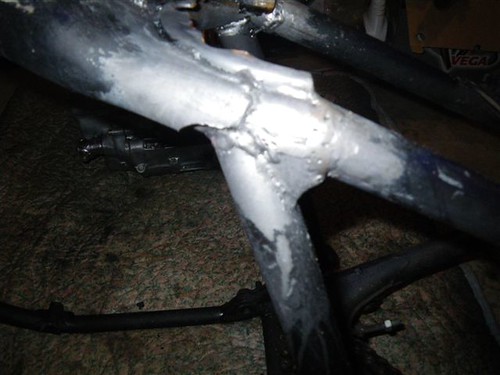
At any rate, here's the rest of the pics of the welds with the paint removed... What do you think? Considering that I'd like to do a modified brat style bike, is this frame salvageable?

Welds at the top near the old seat


Welds at the rear


More rear welds


Front welds


More front welds


Still more of the front

Saturday, February 13, 2010

Proper tools, proper environment, uh-oh!


I finally picked up a work bench this week. I desperately needed a place that I could assemble, disassemble, clean, and store my tools. I found it on Craigslist for $75 and I'm extremely pleased with it. The guy selling it was in the process of moving his mom out of her house and into a retirement, so I feel extra good because I did a good deed helping him out. I remember when we had to move my grandmother - it was not a particularly pleasant experience due to the emotions, so I'm glad I could help.

The workbench (cleaning and organizing underway):


As an added bonus, the vise was included - this will come in very handy and I'm glad I didn't have to shell out another $50-100 to get a new one - and the top drawer was FULL of fasteners. It took me nearly an hour to clean it out.

Drawer:


I also stopped and picked up a few tools I've been needing. I got a digital caliper (I have a real nice analog german one, but I figured digital is just easier to deal with), a valve spring puller, and an impact wrench. The valve spring puller is essentially a giant screw clamp that compresses valve springs so you can pull them out in one piece without mucking up engine internals. I was a little confused as the instructions said you have to use some air attachments but apparently that's for situation where you're not pulling the top end off first. The air basically prevents the pistons from falling into the engine.

So once I got everything cleaned and organized, I figured I'd take the first step and pull the oil pan on the motorcycle to get a look at what I was dealing with. Man am I not pleased. First of all, the thing was missing a bolt that holds on the oil pan. That's right - you see the 10 holes? Only 9 of them had bolts. One was open. On top of that it looks like either make-a-gasket or paint is on the part where the one bolt was missing. I'm assuming gasket material since there was no bolt.

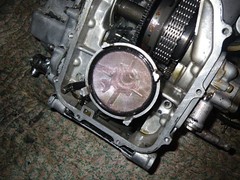
Oil Pan as removed:


I got started cleaning it up, and there was all sorts of gunk in there. It looks like there's a gasket that's been shredded? Either that or maybe this is part of a ring and that's what's caused my compression problem? I don't know but clearly I have some detective work to do. Maybe this is remnants of that gasket material? I'll probably also go ahead and buy a new oil pan gasket.

Gunk I pulled from the oil pan:


So once I got started pulling that gunk out of the pan, it took me a while. A combination of some large tweezers I have, several rags, q-tips, engine degreaser and brake cleaner got it looking pretty good, if I do say so myself. If you enlarge the image, you can see at the top left where there's still some remnant gasket material. Yup that was the open hole.

A much cleaner oil pan


The other issue is that there's a good amount of gunk on the oil pump screen. I'll have to visit the forums and ask for some advice on how to remove that as I don't want to damage that screen.

Gunk on screen:


Another problem I noticed is that there's some rust inside on the gears. Not sure how big of a deal this is - again, I'll ask the good folks over on the SOHC forums their opinions.

Screen gunk and rusty gear (bottom right)


Not sure what this part is but you can clearly see the rust:

Well, more to come. I was hoping to get the top end off and start disassembly today, but that may have to wait.


***Edit***
I managed to get the screen cleaned up with a combination of a very soft bristle brush and a rag. I think it's looking much better now. That's not rust (I don't think so anyways) I think it's just a remnant of the photo.

Cleaned screen:


Monday, February 08, 2010

Still set for the top end teardown

I've been busy posting over at the SOHC forums and neglected posting here. So here's the latest:

I figured out how to check the tappets. All the intakes are adjusted fine, so that wasn't my problem on cylinder no. 2. I couldn't get anything in the exhaust side of any of the cylinders, but I think that's user error. I'll figure that out after I get at the top end.

In the meantime, I've been giving a lot of thought to what I want this thing to look like and how I'd like it to perform when I'm through with it. And I've decided I want a suspension on the rear end. It should make riding that much more enjoyable.

So that being the case, I've asked some questions over on the forums about what steps to take to move in that direction.

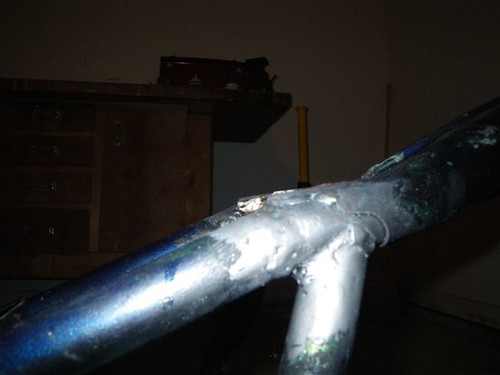
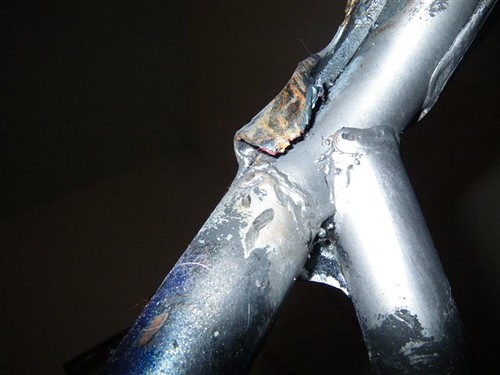
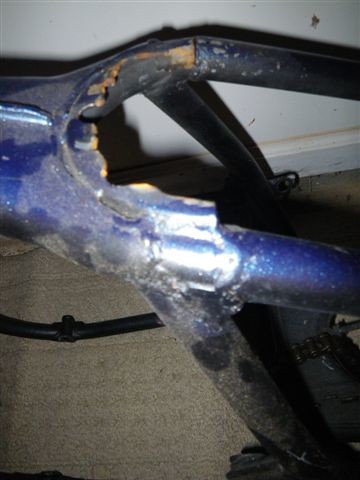
Here's some pics of the welds as the frame sits. They're not looking so great.


This one's a bit blurry, but you can see some of the issues.


Wow the welds look worse in the photos than they do in person. But that's a bad sign to me. If me, as a non-welder/fabricator can see the problems here... probably worth my time to get either another frame or swingarm.


This one's of the underside where it's not painted that blue... and it looks pretty bad >:(


So....? Time for a new frame?

Tuesday, February 02, 2010

Getting ready for top end tear down

I'll probably dig in to the first engine this weekend and see what happens. I have all the manuals that were posted on the forums for the CB550 - not sure if I'll need a Clymer's also. Glad I have the shop manual to give me all the torque readings! A quick glance tells me that there's only one (steering stem nut) that's over 50 lbs-ft and most everything in the engine looks like it's in the 6-20 lbs-ft range.

I'll probably end up getting a 3/8 drive torque wrench up to 50 for the engine. Maybe a second with a larger range for the frame. But I'll get those later since I need it for reassembly and not tear down.

I also don't have an impact wrench yet (no compressor) but I've been thinking about that one of these days. I think I'll need to put a work bench together first.

At any rate, I have feeler gauges and some of the other helpful things to get me going.

I saw in a thread on the SOHC forums to do a tracing of the head and just stick the bolts and nuts over that tracing - looks like a great idea to me.

Well, this should be fun!

Monday, February 01, 2010

Nothing is easy!

Just finished testing the second engine.

Also not great news, though not quite as bad as engine #1. (I tested both engines cold since they're both out of the frame)

Results:
Cylinder 1: 60 psi
Cylinder 2: 135 psi
Cylinder 3: 40 psi
Cylinder 4: 145 psi

I think I have a bad head gasket on this one as there's a visible oil leak (once I got to cranking) coming from between the head block and the cylinder block.

So... do I have one good engine between the two? I guess I need to tear into Engine #1 and see if I can figure out what's up with cylinder 2. I'm a bit worried about cylinder 3 on this one. What special tools do I need?

I guess nothing is easy, but at least I should learn a bunch!

Sunday, January 31, 2010

I'm learning a lot with this

So I finally went out and grabbed a compression tester and ran it this afternoon on the engine.

Cylinders 1, 3, and 4 were 120, 110, 100 respectively.

However, Cylinder 2 didn't register at all.

I'm waiting for my pals over on the SOHC forum to weigh in, but I think this means I at least need to rebuild the top end. More to come...

Saturday, January 30, 2010

Progress to share

3 pics of my progress at cleaning up the engine cases. It's a slow work in progress and the PO (previous owner) really went to town with the Krylon, but it's working. The combination of elbow grease, Tal Stripper (that's aircraft paint stripper, mind you), and brake cleaner is making my cases pretty.


Wednesday, January 27, 2010

Onward and... onward?

No pics to show yet. I've started stripping the engine to get all that nasty paint off of it. It's quite the chore. I managed to pull some from various sections but as I'm doing so I'm realizing that all of the exposed rubber on the motor will need replaced. Shouldn't be a huge deal, but I am a little concerned about all that crap maybe being in the engine. Still haven't decided whether or not to break the seal on the engine block - maybe a top end.

Wait - getting ahead of myself. Do one thing at a time. I'm focused on the case right now. Then on to the frame and maybe work on the front forks at the same time.

Man I have too much blue paint to remove!

Saturday, January 23, 2010

Day 5 - Been a long time coming

The story goes like this. I was really busy. Really. No seriously. Anyways, it's been over a year and a half since I did anything on the bike. I ran out of time. A friend of mine at work rides a Triumph and he suggested that I call his mechanic since I was ready to just pay somebody to get this bike going for me. (I know, I know - one of the main reasons I bought it was to learn about it - but time = money and I needed more of both). So I called Eric at British in the City. Super nice guy, but as I figured, he wasn't interested in working on what's essentially a Japanese basket case.

So I decided to get back to it and that's how I got here again. I may take a more leisurely pace and work primarily on weekends, but as you can see below, I've made some progress.

Here's the latest - I got everything (well everything but ONE DAMN CHAIN) off the frame.


So, I can't figure it out. I didn't see a master link on the chain so I'm wondering if the guy I bought it from welded up the hard tail without pulling it? I can't figure out if I can get this chain off the frame. And further, I have no clue if I should. Obviously, I need to so I can get started on the refinishing, but I'm at a loss.

Here's a closeup shot of the chain and the frame:


Off to the SOHC forumes to see if I can find some help!

Wednesday, June 04, 2008

Day 4 - Front End is Off

I found some time to have at the front end tonight. It wasn't terribly difficult, but since I'm a noob, I kept having to run back to the service manual and web sites to make sure of what I was doing. Here it is...


First, I loosened the screws that hold the collets together on the top and bottom triple trees. Once I loosened those, The forks came off relatively easy, with the help of my handy rubber mallet.

I was (and still am) trying to figure out if I want to save this front end and send it out for media blasting and powder coating - or if I'd rather just put a new front end on it entirely. I've been thinking of a springer.

In order to even send the frame out to be cleaned, which I'm planning to do after I get everything off of it, I had to take off the top triple trees. I could not figure out how to do it without risking damage to the steering stem nut.

On the right there is that nut. Apparently, Honda sells - or used to sell in the '70's - a tool specifically for that (it's in the shop manual) which is the 48mm pin spanner - Tool No. 07902-200000. But I'm not buying one - and certainly not for disassembly. I used a screwdriver and that rubber mallet (and a hammer) and gently prodded it loose. It came loose pretty easily once I broke the seal.

What's pretty cool is what's under that steering stem nut - see the next pic for the steering stem bearings.

Those bearings are all ball bearings, packed in grease and held in on the sides by the lip of that piece of the frame, and on top by the nut. -- "It's all ball bearings nowadays. Now you prepare that Fetzer valve with some 3-in-1 oil and some gauze pads, and I'm gonna need 'bout ten quarts of anti-freeze, preferably Prestone. No, no make that Quaker State." -- Good thing I read some tips in some forums though, because there's another one of those on the bottom of the steering stem. So if you're following me, use extra caution when pulling the steering stem - if you plan on reusing the bearings, you'll need all those balls. I'm considering going with a tapered bearing kit from Old Bike Barn (or the like). But even if you go with a new kit, you'll still need to save your bearings and steering stem nut so you can properly guage the height.

Here's the other side of the top triple tree with the other bearings visible:


In that picture, 1 is an important tool that I use. I got it from Sears and it's a magnetic parts holder. There's a magnet in the bottom - and it's AWESOME for applications like this. I didn't have to worry about losing all those bearings, even if they drop out, they're held in place by the magnet. 2 is the actual steering stem, and 3 is the bottom bearing.


Next I will have to figure out and spend some time separating the steering stem from the top triple tree. There's a gasket there, but I'm not sure if I just put it a vice and turn or what. More research on that! A closeup of where the stem joins the triple tree is on the left.


In addition to that step, I'm also going to spend some time going over the front end. There's a bit of rust (though it looks like surface rust) on one of the forks, and I'm guessing that I'll have to put new seals and new oil in it. This truly is a lot of work but I'm really enjoying it. I've already learned a lot - and I'm nowhere near close even to completing my disassembly. For now, the front end is laying on the ground:

Another great thing I realized is that these models of Hondas actually have a steering lock. While that's great, the key I have doesn't fit it. I read how several other folks have run into that problem during their rebuilds - so it's pretty common. I'm way lucky that at least mine wasn't locked! There's always the option of going to a dealer and getting a new lock - but I think I'll probably just end up drilling it out and going without. It's not really necessary and I could use a wheel lock if I ever go anywhere where the bike is likely to be stolen.

So why is it great that I found this out? Take a look at the wheel lock:


Do you see that ring that the lock is sitting in? It looks kind of like a can with a hole in the bottom for the lock to be exposed. The interesting thing is that for the ignition on this bike, that lock was cut length-wise. The next pic shows it to you. So now I have a precisely fit holder for the ignition that I can weld anywhere else on this bike. I've been thinking about moving it back to under the seat so it's closer to the battery. That theoretically means less wiring to run later.

And here's the current setup with the ignition location:


Well, that's it for today. I'm pretty pleased that I got a lot done.

Hopefully I'll have more to share in the coming days!